Yesterday I posted half of the answer to Cheryl's question:
"Do you know how to place 2 photos beside each other- or how to write beside a photo?" I'm back today with part 2.
 How to Place 2 Photos Beside Each Other
The best way I can think of to tell you how to do this involves html coding. It's pretty straight forward though, so stay with me. Here's what you do:
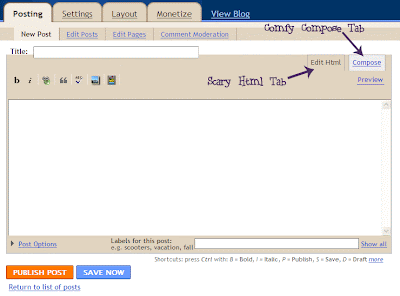
1. Click on the scary html tab

2. Enter the following code:
<center> <img src=""> <img src=""> </center>3. If* you upload your photos to blogger, upload them as you usually would (and they'll be stacked one on top of each other as usual).
2. Then click on "Preview" to preview your blog entry.

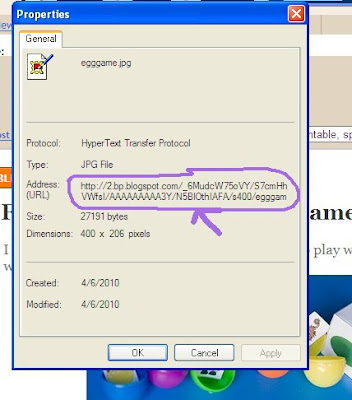
3. Right-click on the first photo, click "Properties"

4. Look for "Address: (URL)"

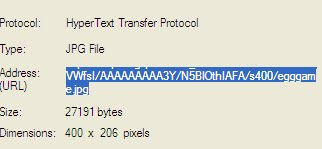
and then hilight and copy the address there (which should start with
http:// and end with
.jpg or
.gif
 Make sure you get the whole thing- it may not all be visible at once.
5. Click on "Hide Preview"

6. Make sure you're clicked on that scary html tab, and go paste the address you just copied, inbetween the first set of
""
7. Repeat steps 2-6 for the second photo, pasting inbetween the second set of
"" and you're done!
*Note: If you want to use a photo that you've already uploaded somewhere else, you can still use this method- just right click on it wherever it is, and use the address you see.As before, please let me know in the comments whether this tutorial made sense or was useful to you!
And if it didn't make sense or you still have questions, comment & let me know- I'll be happy to help if I know the answer!Got something you'd like to learn about photography or blogging?
Tell me about it in the comments & if I can help, I'll post about it!


